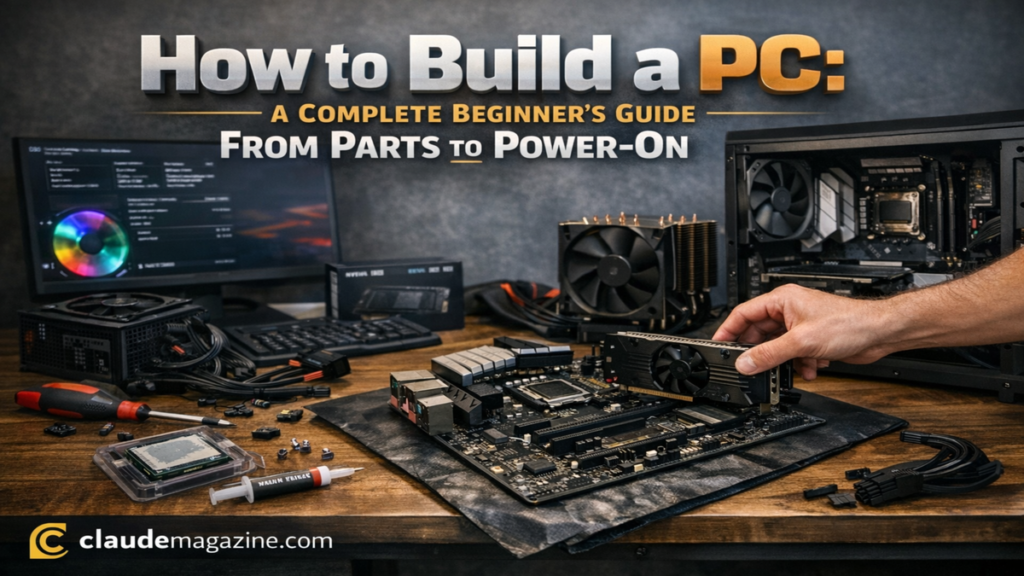
Introduction
i still remember the first time i spread computer parts across a dining table and wondered if i had made a costly mistake. The good news is that building a PC is far more forgiving than it looks. Modern components are standardized, manuals are clear, and the process rewards patience rather than technical bravado. If your goal is gaming, creative work, or simply learning how your machine actually functions, understanding how to build a PC gives you control that prebuilt systems rarely offer.
At its core, learning how to build a PC is about matching compatible parts and assembling them in a logical order. There is no soldering, no programming required on day one, and no advanced electrical knowledge. Each component fits in a specific place, and most connectors only fit one way. The challenge for beginners usually lies in decision making, not dexterity.
In the first hundred words, here is the short answer to what most people search for. Building a PC requires basic tools, compatible components, and one to three hours of careful assembly. With current platforms, mistakes are unlikely if you follow manuals and verify parts before buying.
This guide focuses on practical steps, safety, and balance. I will walk through tools, parts, assembly, and post build setup, then explain CPU and GPU compatibility in plain language. Throughout, i will flag common errors i see repeatedly when helping first time builders.
Tools You Actually Need
Before opening any boxes, prepare a simple workspace. A clean table, good lighting, and time without interruptions matter more than specialized equipment.
Essential Tools
| Tool | Purpose | Notes |
|---|---|---|
| Phillips #2 screwdriver | Tightening most PC screws | Magnetic tip helps |
| Anti static strap or bare surface | Prevents static discharge | Avoid carpet |
| Thermal paste | Improves CPU cooling | Many coolers include it |
| Cable ties | Cable management | Optional but useful |
From firsthand experience, rushing to find tools mid build increases mistakes. Lay everything out first and read the motherboard manual once before starting.
Choosing the Right PC Parts
The heart of how to build a PC is part selection. Compatibility matters more than brand loyalty.
Core Components Overview
| Component | Purpose | Example Specification |
|---|---|---|
| CPU | Handles instructions | Intel i5 14600K or AMD Ryzen 5 7600X |
| Motherboard | Connects all parts | B760 or B650 chipset |
| RAM | Short term memory | 32GB DDR5 6000MHz |
| Storage | OS and files | 1TB NVMe SSD |
| GPU | Graphics processing | RTX 4070 or integrated |
| PSU | Power delivery | 650W 80 Plus Gold |
| Case | Physical housing | Mid tower airflow focused |
| CPU Cooler | Heat management | Stock or tower air cooler |
Brands like Intel, AMD, and NVIDIA lead their categories, but performance tiers matter more than logos.
A practical quote often shared by system builders comes from Linus Sebastian of Linus Tech Tips: “Most PC mistakes happen before the build even starts, when people choose mismatched parts.”
Compatibility Basics Without the Jargon
Many beginners fear that CPUs and GPUs must somehow match directly. They do not.
Physical Compatibility
GPUs connect to a universal PCIe x16 slot on the motherboard. Any modern platform supports this.
- PCIe 3.0, 4.0, and 5.0 GPUs work on AM4, AM5, and LGA1700 boards
- There are no CPU socket restrictions for GPUs
- Always check case clearance and PSU connectors
Performance Balance
Avoid pairing a very strong GPU with a weak CPU if gaming is your goal.
| Resolution | Balanced Pair | Budget Example | High End Example |
|—|—|—|
| 1080p | Mid CPU and mid GPU | Ryzen 5 5600 and RTX 3060 | i5 14600K and RTX 4070 |
| 1440p | Higher GPU priority | Ryzen 7 7700X and RTX 4070 | i7 14700K and RTX 4080 |
| 4K | GPU heavy builds | Ryzen 9 7950X3D and RTX 4090 | i9 14900K and RTX 5090 |
As a rule, the GPU handles most gaming workload. Spend roughly sixty percent of your budget there unless you do heavy multitasking or content creation.
Step by Step PC Assembly
This is where how to build a PC becomes hands on.
Preparing the Motherboard
Place the motherboard on its box. Install the CPU by aligning the small triangle on the chip with the socket marker. Do not force it. Install RAM in the recommended slots, usually two and four. Insert the NVMe SSD at a slight angle and secure it.
A useful reminder from Gamers Nexus, a respected hardware review outlet, states that most no boot issues come from improperly seated memory.
Cooling and Test Boot
Apply a pea sized amount of thermal paste if needed. Mount the cooler using even pressure in a cross pattern. Before placing everything in the case, connect the power supply cables and perform a test boot. Fans should spin and the BIOS screen should appear.
This step saved me once from discovering a loose CPU power cable after full installation.
Installing in the Case
Install standoffs, then the motherboard, tightening the center screw first. Mount the PSU and route cables cleanly. Install the GPU into the top PCIe slot and connect its power cables.
Fan orientation matters. Front and bottom pull air in. Top and rear push air out.
Cable Management and Final Checks
Tidy cables behind the motherboard tray. Clear airflow reduces noise and heat. Double check all power connections.
From years of building, i can say cable management is less about beauty and more about avoiding accidental disconnections later.
First Boot and Software Setup
Enter BIOS by pressing Delete or F2. Enable XMP or DOCP to run RAM at rated speed. Install Windows from a USB drive created with Rufus. Update chipset and GPU drivers directly from manufacturer sites.
Expect the entire process to take one to three hours your first time.
Power Supply Sizing Explained Simply
| Component | Typical Draw |
|---|---|
| CPU | 125W |
| GPU | 300W |
| Other parts | 100W |
Add the numbers and multiply by 1.2 for headroom. This example points to a 650W PSU. Choosing quality here improves long term reliability.
Common Beginner Issues and Fixes
- No display means reseat RAM or GPU
- Random shutdowns often trace back to PSU cables
- High temperatures usually mean cooler mounting issues
An experienced builder once told me, “Slow down and reread the manual.” That advice has never failed.
Takeaways
- Building a PC is a structured process, not guesswork
- Compatibility matters more than brand choice
- Test booting saves time and frustration
- Balance CPU and GPU for your resolution
- Quality power supplies protect your investment
- Expect learning moments during your first build
Conclusion
Learning how to build a PC is one of the most practical tech skills you can acquire. It demystifies the machine you rely on daily and gives you confidence to upgrade, repair, or optimize it over time. The process rewards preparation and patience, not prior expertise. Modern hardware standards make compatibility predictable, and clear documentation fills in the rest.
From a safety and usability perspective, building your own system often results in better airflow, quieter operation, and fewer hidden compromises than prebuilt alternatives. More importantly, it aligns your budget with your actual needs. Whether you aim to game, edit video, or simply understand your technology better, knowing how to build a PC puts that control back in your hands.
Read: How to Change Oil Safely and Correctly at Home
FAQs
Is building a PC safe for beginners?
Yes. Modern components are designed to prevent incorrect installation. Following manuals and avoiding static discharge keeps risks minimal.
How long does it take to build a PC?
For a first timer, expect one to three hours. Rushing increases mistakes.
Do CPUs and GPUs need special compatibility?
No. GPUs work universally through PCIe slots. Balance performance tiers instead.
Is building cheaper than buying prebuilt?
Often yes, especially for mid range and high end systems, though prices fluctuate.
Can i upgrade parts later?
Absolutely. That flexibility is a key benefit of learning how to build a PC.
References
Gamers Nexus. 2024. PC building basics and troubleshooting. https://www.gamersnexus.net
Intel. 2025. Desktop processor installation guide. https://www.intel.com
AMD. 2025. Ryzen processor build resources. https://www.amd.com
NVIDIA. 2025. GPU installation and power guidelines. https://www.nvidia.com